How to Make a Custom Banner: Design and Order Guide
 Jean
May 3, 2026Updated October 19, 20269 min read
How Do You Make a Custom Business Banner?
Make a custom banner by choosing one goal, measuring the display area, setting the size, writing one headline and action, building artwork to final proportions, and approving the proof. A 6 ft x 3 ft single-sided 13oz Standard banner is $133.00. Printed in the USA in 3 business days after approval, with flat $10 shipping to any US address.
Make the banner in this order: choose one job, measure the display area, select the finished dimensions, write the message, build artwork in the correct proportions, choose the finishing, and review the proof. Starting with decoration usually creates a crowded layout because the goal and physical space have not limited the choices yet.
A 6 ft x 3 ft single-sided 13oz Standard banner is $133.00 with hems and grommets included. Printed in the USA in 3 business days after artwork approval and shipped nationwide, flat $10 shipping to any US address.
The banner should answer three questions quickly: who is speaking, what is happening, and what should the reader do next? A restaurant may announce a new lunch service. A contractor may identify the business at a job site. A school may point families toward registration. Each banner needs its own single priority.
| Planning decision | What to record | What it prevents |
|---|---|---|
| Goal | One outcome for one audience | Competing messages |
| Display area | Usable width, height, obstructions, clearance | A banner that does not fit |
| Finished size | Exact dimensions and orientation | Artwork with the wrong proportions |
| Viewing situation | Reader position, movement, surroundings | Copy that cannot be understood in time |
| Message | Business name, headline, one action | Tiny secondary text |
| Artwork | Final ratio, images, colors, fonts, edges | Stretching and unexpected changes |
| Finishing | Hems, grommets, mounting plan | Attachment conflicts |
| Proof | Wording, numbers, layout, crop, finishing | Preventable print errors |
Complete this master checklist before approving the proof.
What Goal Should the Banner Have?
A business banner should pursue one clear outcome. Write that outcome as a sentence before writing the headline: "Tell weekday commuters that Bramble & Finch Cafe now serves breakfast," or "Direct families to Northline Academy registration." The sample business and offer become concrete, which makes the design easier to judge.
If two goals require different actions, use two banners or choose the more important action. "Grand opening," "now hiring," "catering available," and a full menu compete because each asks the reader to remember something different. A strong banner can include a business name and supporting detail, but every element should reinforce the same job.
How Do You Choose the Right Banner Size?
Choose size from the measured display area and viewing situation, not from a list of popular dimensions alone. Measure the usable width and height, then subtract the clearance required by the property and mounting system. Record doors, windows, rails, columns, lights, cameras, landscaping, vehicles, and any safety information that must remain visible.
Standard custom printed banner sizes run from 2 ft × 4 ft to 10 ft × 20 ft, with any custom size available. A 6 ft × 3 ft banner has a 2:1 width-to-height ratio. Artwork built at another ratio may need cropping, added background, or a new layout to fit cleanly.
Photograph the location straight on and from the reader's approach. The straight view helps with proportion and obstructions. The approach view shows whether the banner will be hidden or visually crowded. If it will hang outdoors, include the mounting surface and surrounding structure so the person responsible for installation can plan appropriate hardware.
What Should the Banner Say?
The banner should lead with one plain headline and one action. Put the business or organization name where it can be recognized, then give the reader the event, offer, direction, or reason to respond. A date matters when the message expires. A URL or phone number matters only when a reader can realistically use it.
Write the message in text before opening the design program. For the sample pet-care brand Cedar Lane Pet Care, the working copy might be "Saturday Adoption Day," followed by "May 16, 10 AM to 2 PM" and a short web address. The business name, event, date, and action all support the same goal. A paragraph about services would dilute it.
How Should You Lay Out a Business Banner?
Lay out the banner in the same proportions as the finished print. Establish a simple hierarchy: brand, primary message, action. Use contrast between the important words and their background, and leave quiet space around the message. A logo should not compete with a headline, and a decorative photograph should not make the action hard to find.
Build full color with restraint. A credible sample business can use a photograph, brand color, shape, and clean typography without filling every area. Keep important words, dates, and contact details away from the finished edge and grommet area. The hem and metal rings are physical parts of the product, not invisible margins.
What File Should You Send for Banner Printing?
Send the cleanest source available, with the correct proportions and enough image detail for the intended finished size. A well-prepared PDF is useful because it can preserve a complete layout, but the extension alone does not make a file print-ready. A PDF may still contain low-detail images, missing fonts, transparency problems, or the wrong dimensions.
Likewise, a JPG is not automatically unusable. A high-quality image at suitable dimensions may print well, while a small compressed image enlarged across a wide banner may show artifacts. Print quality depends on the actual file, its content, the enlargement required, and the viewing conditions. Fixed resolution rules without that context can mislead.
How Do You Choose Banner Finishing?
Choose finishing from the display plan. Hems reinforce the perimeter, and grommets create defined attachment points. Both are included with the custom printed banner configuration. Their positions should remain clear of critical words, faces, dates, and small logos.
The mounting surface and structure determine the hardware, not the artwork file. Identify whether the banner will connect to a fence, wall, railing, frame, or another approved support. Use hardware appropriate to that surface and expected load, follow property and hardware maker instructions, avoid utilities, and use qualified help for height, masonry, uncertain structures, or public areas.
No material or fastening choice makes every outdoor location safe. Wind exposure and supporting structures vary. Printing does not include installation. Inline Graphics supplies the printed banner with its selected finishing. The customer and installer remain responsible for permission, hardware, access, structural suitability, and the final site setup.
How Should You Review the Banner Proof?
Review the proof at two levels: content first, construction second. Verify the business name, headline, dates, times, phone number, URL, spelling, and legal or event details. Then inspect the finished dimensions, orientation, crop, image detail, edge clearance, hem area, grommet positions, and whether the single-sided layout is correct.
Approval should happen only after the decision-maker has checked the exact proof. A corrected source file does not change an already issued proof unless a revised proof is supplied. Save the approved version with the order record, especially when the banner has dates, prices, or contact information that may change later.
What We See on Banner Proofs
Files arrive as AI images, screenshots, or logos that are too small for the intended print size. On a print order, Inline Graphics can make a file print ready for $14.99 per item by cleaning it up and upscaling it, always with a proof before printing. Hems and grommets occupy the banner's edge, so copy placed near the perimeter gets crowded.
How Would a Bakery Plan a Breakfast Banner?
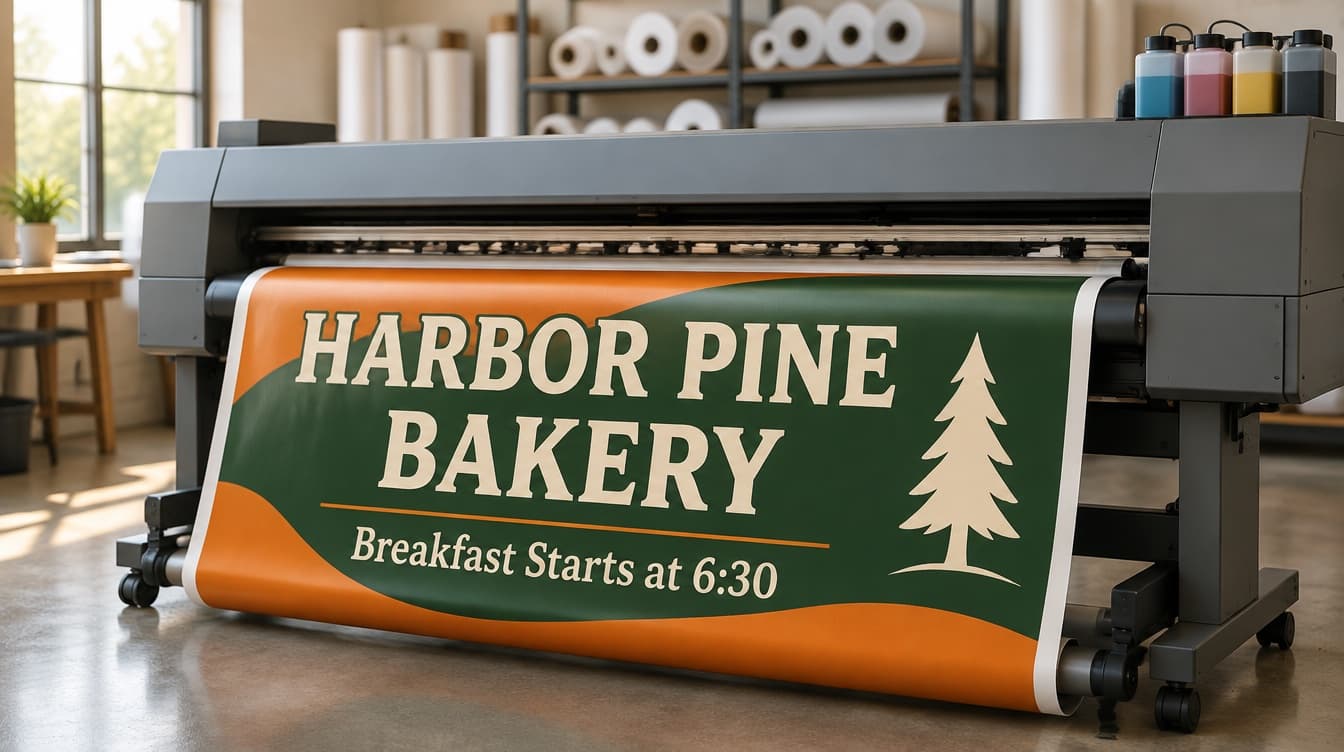
In this example, Harbor Pine Bakery is a sample business adding weekday breakfast. The owner first writes the goal: tell morning commuters that breakfast begins at 6:30 AM. The measured railing area accepts a 6 ft × 3 ft banner, subject to the property manager's approved mounting method.
The headline becomes "Breakfast Starts at 6:30," with the bakery name above and a short URL below. The team removes a list of pastries because it competes with the opening-time message. The design uses a warm food photograph on one side and a quiet solid field behind the headline. Important content stays away from the hem and grommets.
The file matches the 2:1 finished proportion. On the proof, the owner checks the time, URL, crop, edge clearance, and all grommet locations. A person unfamiliar with the project can state the message after a brief look. The banner then enters 3 business day production after approval, while the property manager handles the separate site-specific mounting plan.
What Banner Design Mistakes Should You Avoid?
Avoid beginning with a template whose ratio does not match the measured location. Stretching or cropping later can distort the logo or remove useful content. Avoid turning the banner into a brochure. Small service lists, multiple calls to action, and long disclaimers rarely support fast understanding.
Avoid treating file type as a quality guarantee. Neither "PDF" nor "JPG" answers whether the actual artwork contains enough detail and correct dimensions. Avoid declaring one color mode mandatory without checking the printer's workflow. The proof should show how the submitted design is prepared for production.
Avoid approving from a zoomed-in view only. Check the message at a realistic scale and against the location. Keep critical content away from edges and grommets. Finally, avoid leaving installation planning until delivery. The display surface, property permission, appropriate hardware, safe access, and responsible installer should be known before the banner is printed.
What Comes With the Custom Printed Banner Order?
The order includes the selected printed banner with hems and grommets. A 6 ft × 3 ft, single-sided banner in 13oz Standard vinyl is $133.00. Standard sizes range from 2 ft × 4 ft through 10 ft × 20 ft, and any custom size can be configured.
Production is 3 business days after artwork approval. The banner is printed in the USA and ships nationwide for a flat $10 to any US address. Shipping time follows production, so work backward from the date the banner must be displayed.
Bring the goal, exact measurements, final copy, best artwork files, and mounting notes together before ordering. Then configure the custom printed banner, upload the artwork, and review the proof as the final decision document.
Frequently Asked Questions
Choose one goal, measure the display area, set the finished dimensions, write a short headline and one action, then build the artwork in the same proportions as the banner. Upload the file and review the proof for wording, dates, contact details, edges, image quality, and finishing before approval.
Standard choices range from 2 ft × 4 ft through 10 ft × 20 ft, and any custom size is available. The right size fits the measured display area and the distance from which people need to understand the message. Measure width, height, obstructions, and mounting clearance before choosing.
Lead with the one message a reader must understand, then add one useful action such as a date, URL, phone number, direction, or invitation. Keep the business name visible and remove details that compete with the main point. The banner should still make sense when seen briefly and without explanation.
No. A PDF can preserve a finished layout well, but a suitable image or design file may also work. Print readiness depends on the file's actual dimensions, proportions, image detail, fonts, effects, and content. Review the proof rather than assuming that one file extension guarantees or prevents a clean print.
Yes. Hems and grommets are included with the custom printed banner configuration. The hem reinforces the perimeter, and the grommets create defined attachment points. The correct mounting hardware is a separate site decision because it must match the surface, structure, expected load, and property rules.
Production is 3 business days after artwork approval. Shipping follows production, so allow time for transit before the event or promotion begins. Shipping is a flat $10 to any US address.
A 6 ft × 3 ft single-sided 13oz Standard Custom Printed Banner is $133.00. Hems and grommets are included. Production is 3 business days after artwork approval, and shipping is a flat $10 to any US address.
Related Articles
Banner Sizes: 2x4, 3x6, 4x8, 6x10 Feet and Letter Height
Standard banner sizes are 2 x 4, 3 x 6, 4 x 8 and 6 x 10 feet. Get the letter height rule, hem [...]
Read More: Banner Sizes: 2x4, 3x6, 4x8, 6x10 Feet and Letter Height
Top 7 Advantages of Banner Advertising for Business
The 7 advantages of banner advertising are visibility, flexible sizing, weather-resistant [...]
Read More: Top 7 Advantages of Banner Advertising for Business
How to Get Wrinkles Out of a Vinyl Banner: 4 Safe Methods
Start with gentle, even tension for 1 to 3 hours. Learn when mild heat may be appropriate, what [...]
Read More: How to Get Wrinkles Out of a Vinyl Banner: 4 Safe Methods
Single vs Double-Sided Banners: Cost, Uses and Specs
Double-sided banners use 18oz vinyl and cost about 60 percent more than single-sided. Compare [...]
Read More: Single vs Double-Sided Banners: Cost, Uses and Specs