Fence Banners: Mesh Sizing, Design and Mounting Guide
 Jean
March 22, 2026Updated October 19, 20269 min read
What Makes a Good Fence Banner?
A 6' × 3' 9oz mesh fence banner is $154.00 with hems and grommets included. It is printed in the USA in 3 business days after artwork approval and ships nationwide for a flat $10 to any US address. Measure the usable fence area first, then design around one short message.
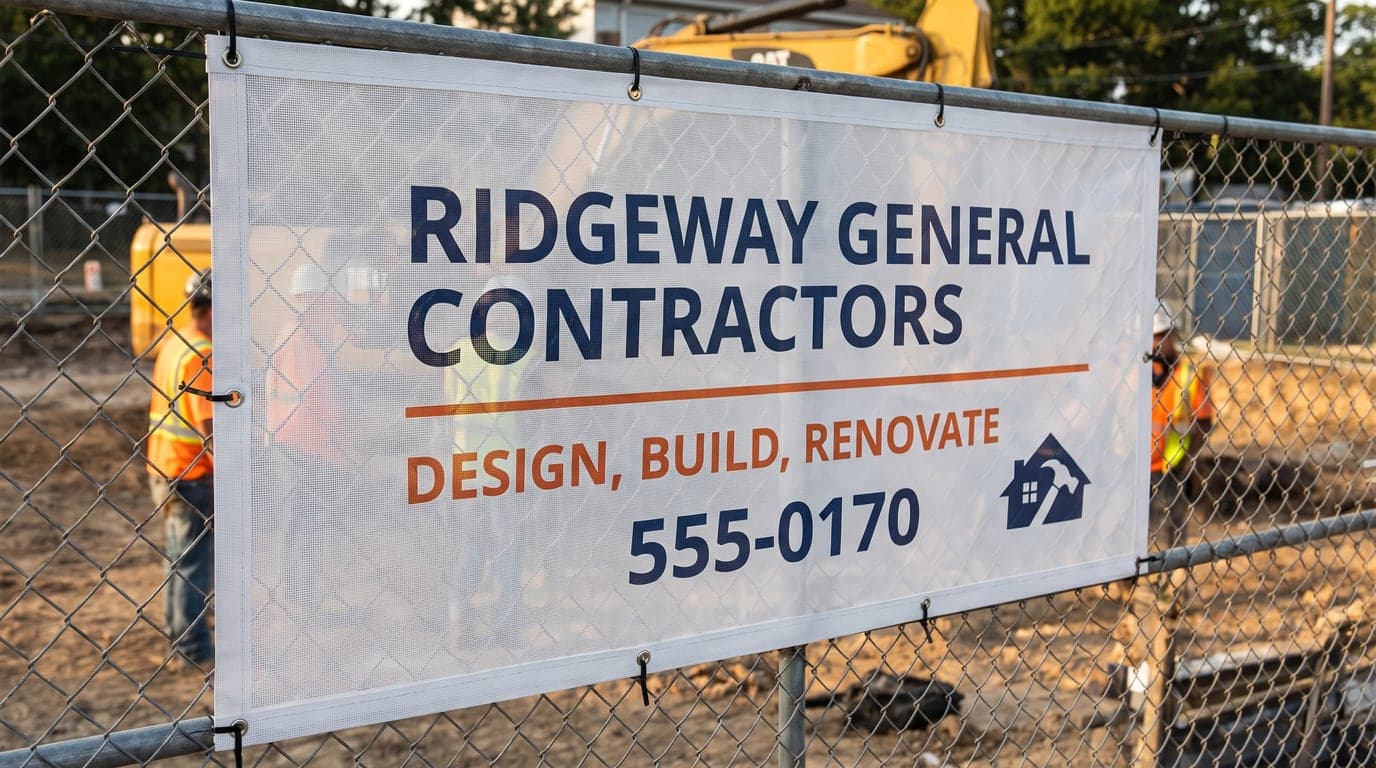
A good fence banner fits the usable fence area, communicates one message, and has an attachment plan before it is printed. Mesh is useful on open fencing because the perforated panel allows air to move through it. That does not make the display maintenance-free. The fence, fasteners, banner edges, and site rules still determine whether the finished display is suitable for the location.
Measure first, then choose from standard sizes between 2' × 4' and 10' × 20', or specify a custom size. The opening 6' × 3' configuration uses 9oz Mesh. Hems and grommets are included, giving the perimeter finished edges and defined attachment points.
| Decision | What to record | Why it matters |
|---|---|---|
| Usable fence area | Clear width and height in feet and inches | Prevents the banner from crossing posts, gates, or uneven sections |
| Reading direction | Where people approach and where they pause | Sets the message order and artwork orientation |
| Viewing setting | Walking area, parking area, field, or job site | Helps limit the amount of copy and choose the main visual |
| Fence condition | Loose wire, sharp edges, damaged rails, or blocked openings | Identifies a surface that should be repaired or avoided before mounting |
| Attachment points | Number and position of included grommets | Helps distribute tension rather than loading only the corners |
| Site access | Gate swing, maintenance path, and required clearance | Keeps the banner out of working areas and moving parts |
The table is the planning sheet. A large banner is not automatically a better banner. The right dimensions fill the clear section of fence without crossing a post, dragging on the ground, or forcing important artwork against an edge.
How Do You Measure a Fence for a Banner?
Measure the clear rectangle where the banner can actually hang, not the total length and height of the fence. Start inside the nearest posts or structural interruptions. Subtract space for gate hardware, hinges, latches, signs, landscaping, and any section that bows or changes height.
Use a tape measure and write width first, then height. Record the dimensions in feet and inches, and take a straight-on photo that shows the full opening. A close photo of the fence material is also useful because chain link, welded wire, and temporary barriers do not present the same attachment pattern.
Check the bottom clearance. A banner that rests on soil, pavement, or plants can collect dirt and abrasion. Check the top clearance too, especially where a rail, cap, or privacy screen changes the flat plane. If the fence is divided into clean bays, measure each bay separately. Two coordinated panels may fit better than one banner pulled across a center post.
Finally, confirm who controls the fence. A property manager, school, event organizer, contractor, or sports organization may set display limits. Approval belongs in the planning step, before artwork is sized.
How Should a Fence Banner Be Positioned?
Position a fence banner on the flattest clear section, with the message facing the direction from which most readers approach. Keep it away from gates, corners, loose fence fabric, and places where equipment or people regularly make contact.
The center of the message should sit where it is naturally seen. At a pedestrian event, that may be near eye level. Along a field, the banner may need to clear players, benches, and stored equipment. At a job site, the display should not cover required notices, warning signs, access controls, or sight lines.
Look beyond the fence itself. A dark banner can disappear against a dark building or shaded background. A pale layout may lose contrast against sky or concrete. View the proposed location from the reader's side and choose artwork that separates clearly from what sits behind the mesh.
Avoid wrapping one flat design around a corner. The bend interrupts words, distorts logos, and concentrates stress at the turn. Treat each direction as its own panel. If the site needs a repeated campaign across several fence bays, keep the visual system consistent while giving every panel one complete message.
How Should a Fence Banner Be Designed?
A fence banner should lead with one short statement, followed by the business or event name and one useful next step. The reader should understand the purpose before noticing secondary details.
Build a simple hierarchy. Make the main message the largest element. Give the name or logo enough space to be recognized without letting it compete with the headline. Use one call to action, such as a short web address, a phone number, or a clear direction. If the action needs an explanation, it is probably too complex for this format.
Contrast matters more than decoration. Put light type on a dark field or dark type on a light field. Avoid placing thin lettering over a busy photograph. Mesh contains open areas, so delicate strokes and tiny details have less solid surface to carry them. Bold shapes, clean type, and uncluttered color fields hold together more clearly.
Design at the final proportion even if the software uses a smaller scale. A 2:1 banner needs a 2:1 artboard. Keep critical words, faces, logos, and contact details comfortably inside the edge so hems and grommets do not crowd them. Extend background colors and images to the file edge according to the artwork requirements shown during ordering and proofing.
How Should Hems and Grommets Be Used?
Hems finish and reinforce the perimeter, while grommets provide the intended attachment points. Both are included on the mesh banner. Plan the artwork so neither feature lands on small type or an essential part of the logo.
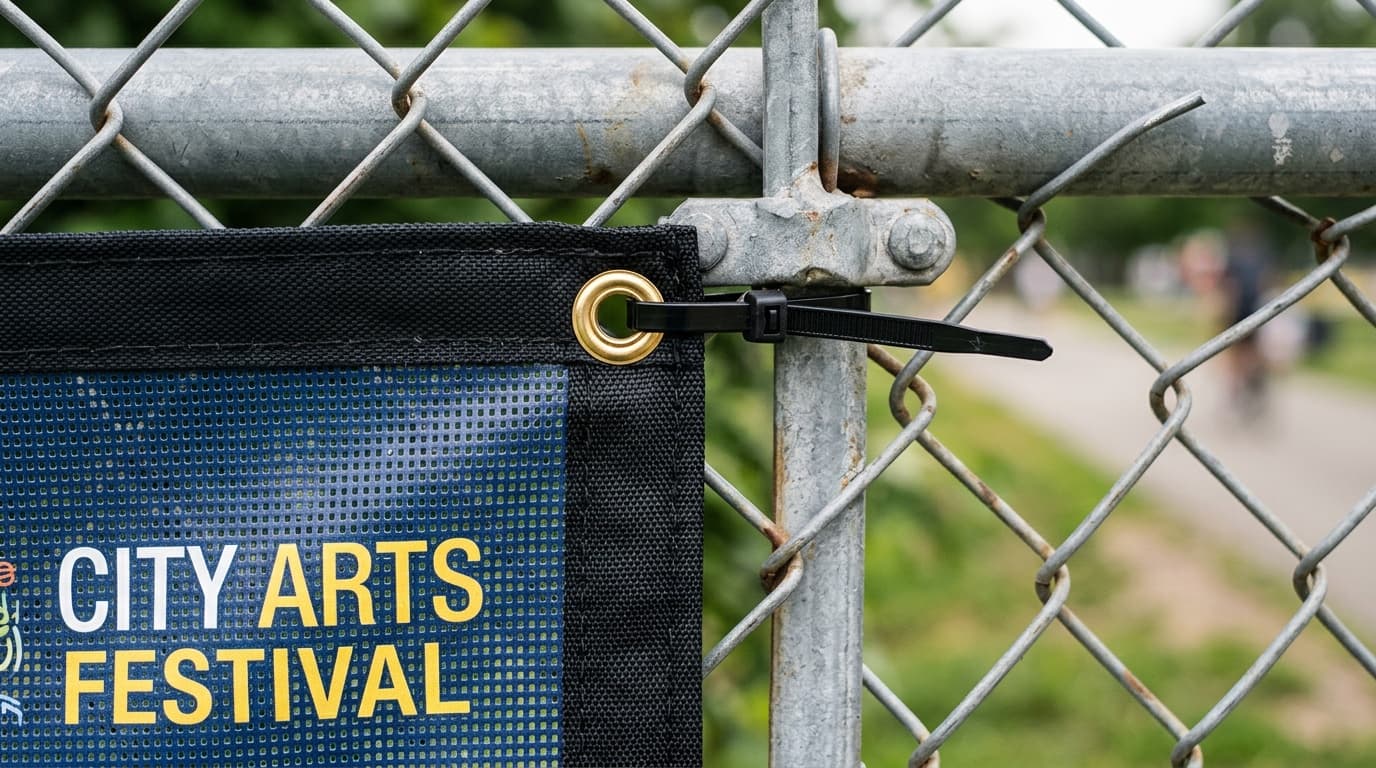
Use every grommet when mounting. Fastening only the four corners leaves long edges unsupported and lets the center move more than it should. Work around the perimeter so the load is shared. The banner should be held flat and even, not stretched until the printed panel is distorted.
Choose fasteners that the fence owner approves and that suit the mounting surface. Inspect the fence first for sharp wire ends or broken components that could abrade the banner. Do not punch extra holes into the mesh, and do not route a fastener through the printed panel instead of a grommet.
After mounting, step back and check that the top and bottom edges read level. Confirm that no fastener tail, loose cord, or corner projects into a walkway. Outdoor displays should be checked periodically and after changing weather. If a fastener loosens or an edge begins rubbing, correct it before the movement grows.
What Does a Mesh Banner Order Include?
A mesh banner order includes 9oz Mesh with hems and grommets. Available dimensions run from 2' × 4' through 10' × 20', and custom sizes are available. A 6' × 3' Mesh Banner is $154.00.
Production is 3 business days after artwork approval. Shipping follows production, so a required display date should account for both production and carrier transit.
Before ordering, have the finished width and height, a photo of the fence, the artwork, and the needed date ready. Review the proof for spelling, contact details, proportions, edge clearance, and the position of important elements. Approval is the last opportunity to catch a wrong phone number or a logo sitting too close to a grommet.
What Do We Notice on Fence Banner Proofs?
Files arrive as AI images, screenshots, or logos that are too small for the intended print size. On a print order, Inline Graphics can make a file print ready for $14.99 per item by cleaning it up and upscaling it, always with a proof before printing. Hems and grommets occupy the banner's edge, so copy placed near the perimeter gets crowded.
How Would a Community Garden Size a Fence Banner?
Imagine Cedar Row Community Garden is announcing a seasonal plant sale. The volunteers have a chain-link fence beside the main walking entrance. They first consider using the entire fence, but measurement shows one clear 8' wide by 4' high bay between a gate hinge and a support post.
They choose a banner proportion that fits that bay with clearance around the hardware. The design says "Spring Plant Sale" in the largest type, "Cedar Row Community Garden" beneath it, and a short web address as the only action. A bright cream headline sits on a deep green field, with one simple leaf illustration rather than a collage of plant photos.
The team submits a straight-on fence photo with the order. On the proof, they notice the web address is too close to the lower edge, so it is moved upward before approval. At the site, they attach the banner through each grommet, keep the tension even, and verify that the gate opens without touching it.
This example works because measurement, placement, design, and mounting were treated as one sequence. The message is not asked to solve a size problem after printing.
What Fence Banner Mistakes Should Be Avoided?
Avoid choosing the size from a guess. A standard size is useful only when it fits the clear fence opening. Measure posts, gates, obstructions, and ground clearance before placing the order.
Avoid using mesh as permission to ignore the site. Perforation helps air move through the panel, but the condition of the fence and the mounting method still matter. A damaged or unsuitable surface should be repaired or ruled out.
Avoid filling the design with everything the organization does. One campaign message is more useful than a miniature brochure. Remove extra contact methods, long schedules, and fine-print explanations. Give the reader one next step.
Avoid securing only the corners, cutting holes through the material, or pulling the banner out of shape. Use the included grommets, distribute tension, and inspect the display after mounting. Finally, do not approve the proof without checking every word and number at a comfortable viewing size. Simple artwork makes mistakes easier to see and the finished fence easier to read.
Frequently Asked Questions
9oz mesh works well on open fences because its perforated construction lets air move through the printed panel. It is still important to inspect the fence, use every grommet, and follow the property owner's rules for outdoor displays.
Mesh banner sizes run from 2' × 4' to 10' × 20', and any custom size is available. Measure the usable fence area rather than the full fence line, then leave clearance from posts, latches, corners, and ground contact.
A 6' × 3' Mesh Banner is $154.00. The opening configuration uses 9oz Mesh, with hems and grommets included.
Production takes 3 business days after artwork approval. Flat $10 shipping is available to any US address, and transit time follows production.
Hems and grommets are included. Use the grommets as the attachment points, distribute tension around the perimeter, and do not cut new holes through the printed mesh.
Start with one message, a prominent business or event name, and one next step. Use strong contrast, make the most important words largest, and remove details that cannot be understood during a brief look.
Related Articles
Banner Sizes: 2x4, 3x6, 4x8, 6x10 Feet and Letter Height
Standard banner sizes are 2 x 4, 3 x 6, 4 x 8 and 6 x 10 feet. Get the letter height rule, hem [...]
Read More: Banner Sizes: 2x4, 3x6, 4x8, 6x10 Feet and Letter Height
Top 7 Advantages of Banner Advertising for Business
The 7 advantages of banner advertising are visibility, flexible sizing, weather-resistant [...]
Read More: Top 7 Advantages of Banner Advertising for Business
How to Get Wrinkles Out of a Vinyl Banner: 4 Safe Methods
Start with gentle, even tension for 1 to 3 hours. Learn when mild heat may be appropriate, what [...]
Read More: How to Get Wrinkles Out of a Vinyl Banner: 4 Safe Methods
Single vs Double-Sided Banners: Cost, Uses and Specs
Double-sided banners use 18oz vinyl and cost about 60 percent more than single-sided. Compare [...]
Read More: Single vs Double-Sided Banners: Cost, Uses and Specs